Hey there !
I invite you to check Lindy Stamp Gang’s blog today as I am sharing the mixed media piece I created especially for the booth we will have at CHA next January.
I hope to see you there 🙂
Hey there !
I invite you to check Lindy Stamp Gang’s blog today as I am sharing the mixed media piece I created especially for the booth we will have at CHA next January.
I hope to see you there 🙂
You now know my total love for Mindy Lacefield. I know for sure that she is one of these Souls I was meant to meet again in this lifetime, I simply adore her. In 2013, she offered a year long class called True Free Spirit, filled with monthly projects. Anastasia is the painting I created inspired by her December project 🙂
You may be aware that I am an art supply hoarder lover. I have plenty of stuff (currently in the process of sorting everything, box by box, and keeping only what I want to use). Mindy’s project reminded me that I actually have a jar of Golden crackle paste (it is very different from the Kroma crackle I usually use now), it looks like white frosting). I wanted to use it somehow. It eventually was used for her hair. Love it.
I was so eager to try the new products from the latest release from Lindy Stamp Gang. It’s a collection called Totally 80’s and designed by Cindy (aka Cynthialoowho). The colors are just amazing and I am happy she came up with them. I don’t like pink in general, except dusty rose because it is more subtle, there is a touch of mauve so it is not pinkinmyface 😉
I went with a winter theme in mind and love how it turned out, even with these two little characters that showed up. They were both pink so I decided to go for it, and add some glittered gel to make them pop a little. By applying it with my finger, I was able to create that texture I love so much.
 to purchase Anastasia. If you’re interested in a print, please contact me.
I love the different textures happening, it is definately a painting that you can discover through your touch as much than with your eyes.
I hope you’ll enjoy the video:
Here are the products I used (click to be redirected to the product’s page):
You may know that I have two daughters: Grenouille (8yo) and Koala (6 ½ yo) that are both very creative in their own unique ways. Koala draws all the time, from memory.
Last Monday she was invited at the birthday party of one of her besties, so we quickly created a card and envelope to go with the gift. All the girls were asked to come dressed as their favorite princess (Koala was Tiana).
We used Lindy Stamp Gang’s sprays and embossing powder. Stencil. Paint from her wooden artist box.
I really love how fearless she is, confident that no matter what the result will be what she was looking for (if not, she will go for it and modify until it meets her expectation).
I am planning on a little something special with her, so stay tuned 😉
I hope you’ll enjoy watching her:
I love seeing everymonth how everyone interprets the color theme with have. Our Design Team always amazes me, we are all so different, but it still makes sense eventually, love it ! And you guys, you’re entering the challenge with such great, and diverse as well, projects ! I’m looking forward to it every month.
Remember, you can find our rules here. You can win a $50 dollars gift certificate in the Lindy Stamp Gang store, with all the new sets coming out, that would be neat.
And see what we came up with right there.
I am often afraid that my creative ideas will run out, and that I will be condamned to do the same things over and over (do you have this creepy feeling too sometimes ?).
I had an idea in mind for this month’s challenge, went to find my supplies and… it did not happen, I have no clue where it went. BUT this is how I found these ceramic tiles I’ve bought at Home Depot a while back, to play with alcohol inks on it. I grabbed them and decided to experiment.
I picked three, because it gives freedom to play, especially that mine were not that big (I am challenged by smaller format now). As every experiment, there is a big part of the results that holds unexpectedness, it works or it doesn’t.
This photo does not make them justice, they were hard to capture on a single picture.
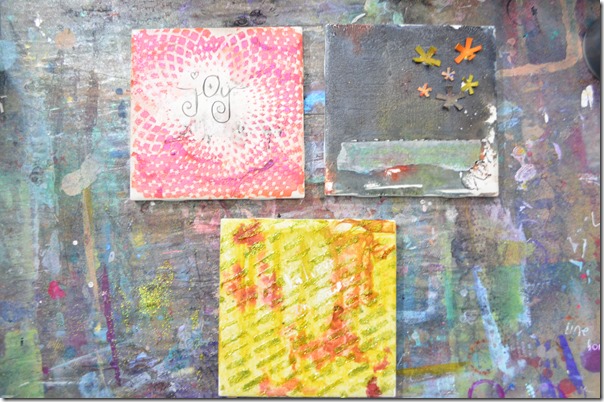
I wanted three drastically different tiles, to play with all the great products we carry. Remember: this was an experiment. I’ve played with this tiles with only one product before, it was alcohol ink 😉 So some of what you’ll see in the video worked, some… not so much.
I hope you’ll enjoy watching my process (remember to turn on the HD !):
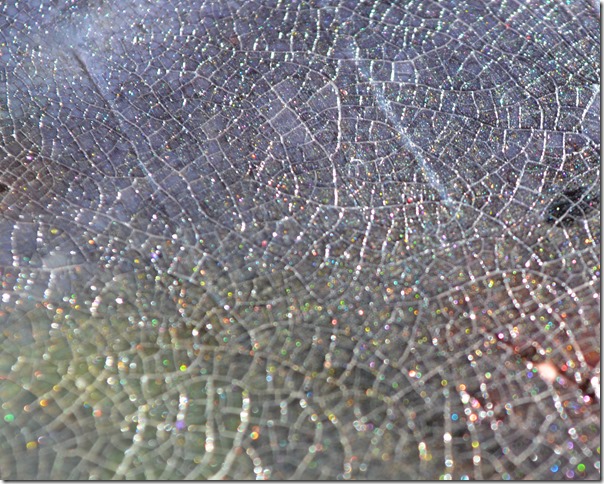
(Look at the gorgeous shimmers. this makes me so happy !). For the first tile, I applied some crackle medium, I used the one from Kroma (it is a local brand but you can now find them pretty easily. If not, please use what you have on hand, the one by Rangers would work as well). This crackle medium can be left to air dry (which I decided to do), or you can activate it with a heating tool.
After 24 hours, the crackles have formed and are so beautiful. I enhanced them with the Midnight Raven Rendez-Vous Starburst Spray. I then sprayed a bit of My Mojito Green and Cana Lily Burnt Orange to add some contrast. I love how the ink went under the cracks, I did not expect it to do that.
I had a sentiment that wanted to go with this tile «Even in the Darkest night, there is always Light». So I grabbed some kraft stars, and colored them with the Starburst Color Shots (most are currently on sale in the vault, so grab them while you can !!). The gripper is very handy. I used: Edelweiss Moss Green, Marigold Yellow Orange, Silent Night Silver and Ghostly Gargoyle White. I wrote my sentiment on Deli paper, hoping it would blend with the tile once glued… which did not happen. But eh, that’s okay !
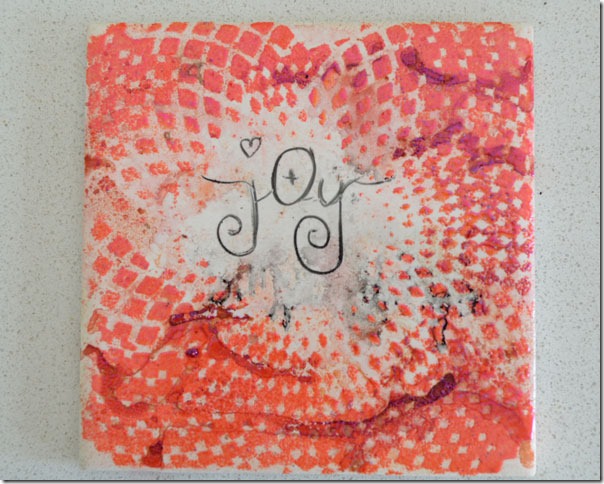
For this tile, I wanted to see how the Sprays would react on the bare ceramic. It is a non-porous surface, so I kinda knew the ink would slip over it. I used A Bit O’Bubbly, Cana Lilly Burnt Orange and Amaryllis Burgundy. Using my heat tool helped, I love the marble effect it created.
Once dry, I placed a 6×6" stencil from The Crafter’s Workshop (this one is on my top 5), and applied embossing ink all over. Then, I covered it all with the Pumpkin Fiesta embossing powder.
It took FOREVER to heat emboss. Really. We can still see the ink underneath, so it creates a cool effect.
I had a sentiment in mind, so I wrote it with my trusty black Stabilo mark-it-all pencil. You’ll see at the end of the video that I changed my mind, as it’s watersoluble it was easy to wipe it off with a wet paper and write something else instead.
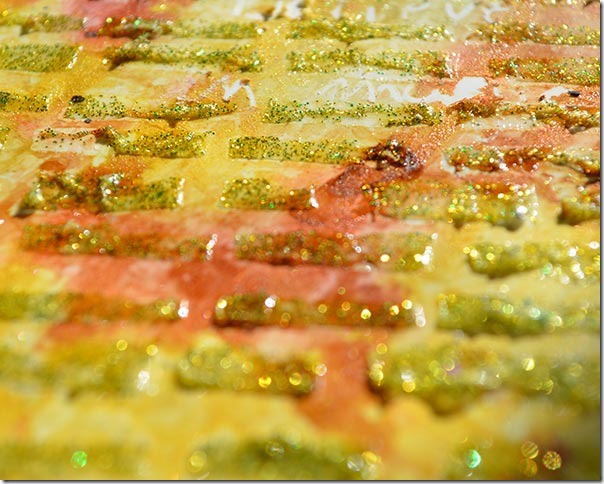
And last but not least (this is my favorite tile of the three !), I wanted to see how fun it would become to make the ceramic porous again. For this purpose, I brushed clear gesso all over the surface, pressed some bubble wrap to add some texture, and dried it.
Then I sprayed Grab A Guy Gold as my base color, then a bit of My Mojito Green, and finally some droplets of Amaryllis Burgundy for a great contrast. Doesn’t it look like beautiful leaves, changing colors during Fall ? Love love it !
If you follow me and my {In Motion} videos, you know that I now love the glitters we have over at Lindy Stamp Gang, and one way I use them is to simply mix the glitter with gel medium. This is what I did with the Chartreuse glitters from the Mad Hatter set. I applied the gel through a stencil, all over the tile. It dries clear, so the glitters really pop !
I finally wrote «Believe In Magic» with my white Stabilo pencil. We have to really look for it to see it, which makes me happy (unexpected happiness is always welcome).
Here is the list of the products I have used (click to go on their page):
ooooh I really need to thank my Sister-From-Another-Mother (aka miss Micki Wilde) for the renewed love for characters and hidden stories they still have to tell.
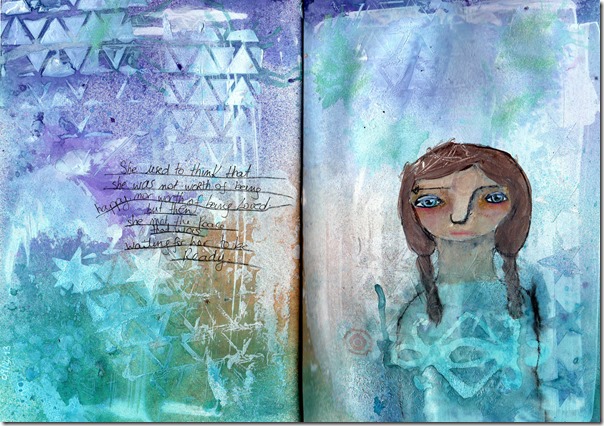
For this week video and art journaling play, I wanted to see how would my sprays would react on different surfaces; and because I love texture so much, I chose to apply super heavy gesso (both through stencils, and by itself. I used my Catalyst blade but you could totally use a palette knife).
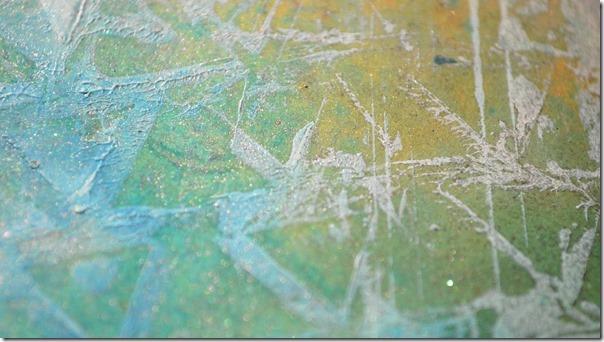
See how we can still notice the gesso despite the heavy spraying ? Oh yay… the ink stays lighter on top of it than it’s true color when on the paper. It offers such a great contrast, I am thinking of doing that more often. Wondering what would happen on canvas and on wood too (some people automatically gesso everything they work on, I used to; but now I skip this step) !
There are several thicknesses of gesso, and each brand is kind of different (for example, the regular gesso from Liquitex is more fluid than the Golden one). Heavy or Exra/Super gesso is good for texture, because it holds in stencils, it has plenty of possibilities.
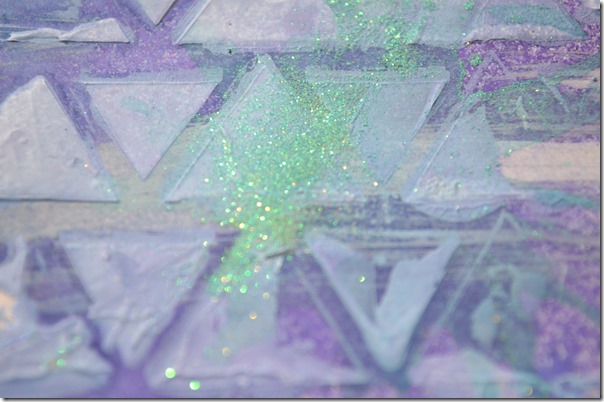
I think I might have fallen into the glitters jar. Oops !
I told you before how fine the glitters, that now coordinates with the newest color sets, are. And how that makes my heart happy.
I don’t like using glue, so finding ways to avoid it is always a good point.
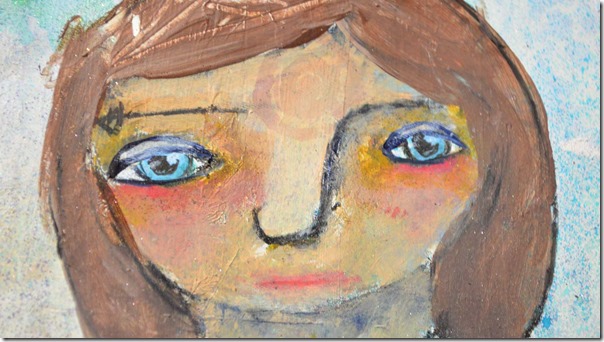
I kept her face simple. Because I did not want to pressure myself, and I wanted to keep it fun for me, putting my feet back in the water not to abruptly.
Oh sure, I kind of cringe when I see that fake mouth and think «oh, if she has a mouth, at least it could be a better one», but eh, I’m okay with how it looks because it’s not what matters the most when I look at her. To me anyway.
I love how the products from Lindy Stamp Gang helps my creativity to soar. And allow me to get back to it when I am in a rut, when I don’t know anything about it anymore (well… at least when I think it’s the case). I start with the sprays and go from there to see where it leads me.
Here is my video, I hope you’ll enjoy (remember to turn the HD on, it’s better):
And because I know we often wonder «what the heck did she use ?», here is a list: